Oct 15, 2026
24h downtime email message
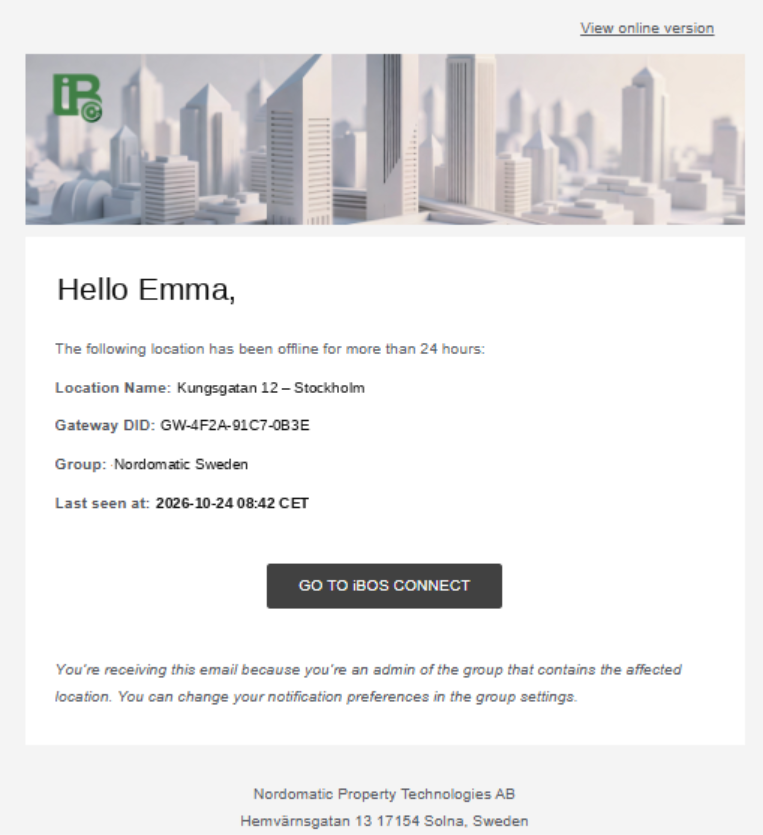
We are making changes to the email you get from us after a location has been down for 24 hours.
We are no longer using the old yanzi domain to send out emails. Instead we use [email protected]
We cleaned up the email template so it looks better and uses our brand names and logos
We will be enabling this functionality step by step overtime, expect the first changes in week 45. If you expected a downtime email but did not receive one, please let us know.
Oct 14, 2026
Today we're rolled out a new release for Connect.
iBOS Data now available in iBOS Connect
You can now access iBOS Data directly from Connect in two ways:
1. iBOS Data Cloud
Open the cloud version of iBOS Data from Products in the top navigation. Use it to create dashboards, configure metadata, and access API documentation.
This option is only available to you in Connect if you are an existing iBOS Data users.
2. iBOS Data for Nexus
Configure data exports from a Nexus to the iBOS Data Cloud.
To access the iBOS Data application running on a specific Nexus:
Create a new tunnel using the template function.
Once it’s set up, iBOS Data appears as an icon at that location, just like iBOS EdgeBMS and iBOS Energy.
The tunnel usually takes about a minute to come online.
This option is only available to Nordomatic employees and partners. In addition it requires at least firmware version 5.12 to be able to create the tunnel/use the template.
The help widget now supports dark mode and follows the theme you’ve set in Connect.
Users with a role below Manager no longer see the Save button on the Nexus position page. Since the previous release, these users could see the button, but it returned an error because they don’t have permission to save changes.
Sep 25, 2026
Today we're rolling out a major release for Connect.
We've integrated a third-party communication tool into Connect so we can stay in closer contact with our community. It lets us:
Give you an easy way to report bugs and request new features
Show banners (for example, to announce maintenance windows) and product tours (for example, to explain how a new feature works)
Ask for your feedback on specific parts of the product
What you'll notice
A Help button now appears on the right-hand side of every page. Clicking it opens a widget where you can report a bug or request a new feature. We translate as much of our communication as possible.
We've also launched a dedicated feedback page at feedback.connect.ibostechnologies.com, where you can subscribe to product updates. We highly recommend subscribing so you're notified as soon as we ship a new release.
You can now record where a location actually is. Go to the settings of a location and click Nexus position, where you can set both an address and a geo position.
The geo position is what we use to plot the location on the map on the landing page, and it doesn't have to match the address. That means you can pinpoint exactly where the Nexus sits on the map while still using, for example, the address of the building entrance.
Once an address is set, you can search for the location by street, city or country.
Two things to be aware of
We haven't added address information to existing locations. To use the new search, add an address to the location first or otherwise it will not show up.
Your search term must match the stored address exactly. We know this isn't ideal, and we'll improve it in an upcoming release: you'll be able to start typing an address and see all locations within a given radius.
Address information for a MSEM-based location
You can now set location information for locations based on an MSEM. This means these locations also appear on the general map on the landing page.
Bugfixes
Fixed an issue where some users could start the gateway pairing process despite their role not permitting it.
Fixed an issue where long tunnel names were displayed incorrectly in the tunnel overview.
General
New users could see the Groups menu even though it was empty until they were granted access. The menu is now hidden in that case.
Apr 14, 2026
We would like to inform you that we are discontinuing our product SEM in favor of MSEM. Starting from June 1st, the SEM will no longer be available as a download.
For clarity, SEM stands for Secure Edge Module. In this case, we are referring to the software version of the SEM, which is also included in all of our Nexus products. Its purpose is to ensure that the Nexus is securely connected to our cloud environment.
Both the SEM and MSEM can be installed on a Windows machine, allowing that machine to appear as a location in the Connect dashboard. From there, you can create tunnels to devices on the same network as the machine where the SEM or MSEM is installed.
The MSEM, or MicroSEM, is a streamlined version of the SEM. Going forward, we will be supporting only the MSEM.
You can find more information about the SEM, MSEM, and the reasons for this change at this link.
If you have any questions or concerns, please feel free to reach out to us.
Mar 30, 2026
We have created a new version of the Micro SEM installer. This new version not only supports Nordic characters for tunnel names, it also comes with a web based UI. I think this is a nice improvement over the CLI based UI that we have today.
You can download the installer here: https://downloads.ibostechnologies.com/msem/micro-sem-service-0.1.13.msi
The UI is accessible via http://localhost:8089


Feb 2, 2026
Because some of our customers have been beta testing iBOS Alarms for a while before the launch, we had a chance to introduce some nice improvements as well:

Point 1 and 2: we introduced a way to acknowledge alarms in a grouped way.
Point 3 and 4: we removed the colors in the domain column and toned down the brightness of the other colors used in the table. This should make it easier to focus on the most important aspects.
Point 5: we reduced the amount of space the filtering buttons take up freeing up more space to show the actual alarms. You can still click on Emergency, Alert and Critical to easily filter on those categories.
Point 6: it is now possible to collapse the columns. If there are certain columns that you don't want to see just collapse them and they will stay collapsed until you open them again.
To help onboard new users we introduced a tour that guides you through the "group management" functionality. This tour is accessible in three ways:
1. When you first click on the group management button it will show up by default.
2. When there is no alarms visible (the table is empty) we show a link to the group management part, this also starts the tour.
3. You can always open the tour again by clicking "start tour" at the top of the group management page.
We also improved the Swedish translations used throughout the functionality.